Supplies I Used
Straight Edge Scissors (for free cutting)
Straight Edge Paper Cutter (for uniform/mass cutting)
Rounded Corner Punch
1/4" Single Hole Punch (for standard hole punching)
1/8" Single Hole Punch (for brads)
Permanent Adhesive Tape (tons and tons)
Removeable Adhesive Glue/Dots
Hot Glue Gun with Glue Sticks
Photoprinter with Fresh Ink
Microsoft Publisher & Word
Paper
Navy Cardstock - 100lb Midnight Blue Cardstock from Blue Dot Paper Shop
Navy Envelopes - A7 70lb Midnight Blue and 4-Bar Midnight Blue Envelopes
Khaki Cardstock - 80lb Taupe Brown Recycled Cardstock from Paper and More
Khaki Pocketfolds - A7 Pocket Himalaya Taupe Brown Recycled from Paper and More
Khaki Envelopes (Tissue Packets) - 4-Bar Taupe Brown Recycled from Paper and More
White Vellum Paper - White Translucent Vellum Paper #29 from Paper and More
Fonts & Colors
Main Headings - Jane Austen TTC*
Sub Headings - Pristina
Monogram "&" Symbol - Windsong TTC*
Filler/Paragraph Text - Copperplate Gothic Light, High Tower Text
* Downloaded from Da Font
Navy - 1R, 33G, 99B
Tan - 144R, 122G, 82B
Docs & Directions
Please feel free to use any of the documents or directions posted here, so long as you credit them back. Please note that text in Jane Austen font may come out as large block letters if you do not have Jane Austen downloaded on your PC, and you may need size/space readjusting.
For more information on the DIY projects I did, please check out my planning bio.
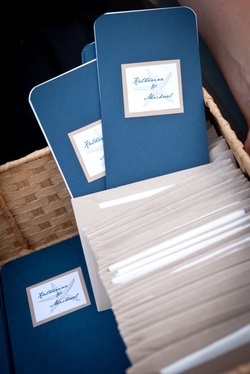
Invitations
|
|
||||||||||
Ceremony
|
|
||||
Reception
|
|
||||||||||||||
OOT Bags
|
|
||||||||||||||
Fan Programs
What You'll Need:
Insert Cardstock (4 pages = 3 fans)
100lb Color Cardstock (front/back cover)
Colored Cardstock (monogram mat)
White Cardstock (Monogram, inside blades)
Corner Rounder Punch
Heavy-duty straight edge cutter
Permanent adhesive
1/8 inch single hole punch
Brads
Permanent Marker
Pencil
What You'll Do:
Customize and print your inserts on white cardstock (4 pages of cardstock = 3 fans). Take one of your insert sheets and line it up with your straight edge cutter. Mark where the blades start and end with permanent marker directly on the cutter. Line a colored cardstock sheet up to the edge and mark those lines on the colored cardstock with pencil - this marks where to cut to get your front and back blades.
Once all of your blades (white and colored) are cut, use a corner rounder punch (or desired corner design) to round your corners. Put together each program, with a colored cardstock blade on the front and back. Use your single hole punch to punch a single hole through the entire stack of paper (it takes some strength, but you''ll get even holes this way). Push brad through the hole and fasten. Secure your matted monogram square on the front blade of each program.
Hint: Make sure to use heavier cardstock for the front and back blades - this will give your program some structure (and keep it from flopping over in the wind) when people open them fan-style.
Tissue Packets
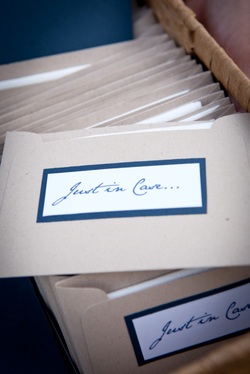
What You'll Need:
4-Bar Envelopes (RSVP Size)
White Cardstock (for label)
Colored Cardstock (for label mat)
Straight Edge Paper Cutter
Permanent Adhesive
Plain Tissues
What You'll Do:
Take each envelope and use your straight edge cutter to cut off the envelope flap. Cut and mat labels and adhere with permanent adhesive. Fold two tissues and place them into each envelope. It's that easy. :)
Hint: Be sure to use plain tissue. Tissues with lotion can eventually show through your envelopes like grease. We used extra-strength Kleenex because it was super soft and would hold up.
Mock Etched Vases
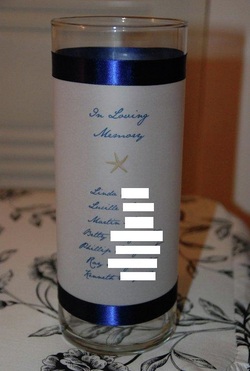
What You'll Need::
Tall clear pillar vase
Translucent white vellum paper
1/2 - 3/4 inch width satin ribbon
Permanent adhesive tape
Color printer
What To Do:
Create your desired design so it will print in landscape layout. Definitely print a trial run on plain white printer paper to make sure it will fit on the vase as you would like, and that none of the print will be covered by the ribbon. Once it is how you like it, print your design on the vellum paper, allow ink to dry, then carefully run through at least once more, or until the print is dark enough for your tastes. Allow to dry completely between each printer run, and once you are finished.
Wash the vase inside and out with glass cleaner and allow to dry completely. Lay the vellum sheet face down on a flat, clean surface, and run a single strip of permanent adhesive on each of the short ends. Carefully line the vellum up with so the glass at the top and bottom are the same size, then carefully press the first edge to the vase. Carefully wrap the vellum around, making sure the bottom and top edge are even all around, then seal the second end on top the first. Run permanent adhesive tape along the length of each ribbon, then carefully run them over the top and bottom edges of the vellum. Store in a sealed plastic bag until ready to use (will protect it from humidity).
Hint: Be sure to wash your hands well before you touch the vellum, especially when adhering it to the vase. Vellum will pick up any oils on your fingers (especially hand lotion) and you'll have to start over again.
